Using the Microcontrollers that were produred in 2019
Disclaimer:
Please have fun with these microcontrollers, but use them at your own risk. I will not be responsible for damage to your computer caused by faulty electronics you create, or if you corrupt your operating system with a new driver, etc. I have had many good years playing with these things, but your mileage may vary.
Do I have to use mine?
No! No one will be disadvantaged by not choosing to use these items, as they form an entirely optional part of the course.
What if I decide not to use mine after all?
That's OK. If you really don't expect to use it, then please post it back to me via the University Mail Service. The UMS is free, so you only need an envelope - which can even be second hand! If you return your device to me, I can give it to someone else next year. You can address the envelope to "Dr Lester, Peterhouse".
How do I use it?
Step 0
Do not plug in your board until Step 4 below!
Step 1 (may not always be required?)
Download and install the appropriate driver from
this page so that your computer can talk to the CH340 controller chip on the device. I am pretty sure all Mac users would have needed to do this step in 2019, but since then I am told that mac updates should have rendered it unnecessary. Most linux users will not need to do it. I don't know whether Windows users will or won't need to do this step -- you could try skipping it -- but then you may get problems in Step 4. If that happens, come back here, complete Step 1, and then go back to Step 4. Please let me know what worked for you.
Step 2
Dowload and install the Arduino IDE and then launch it.
Step 3
BEFORE YOU PLUG IN YOUR BOARD, have a look at the available options in the
Tools→Port menu of the Arduino IDE.
These options show the communication channels over which the Arduino IDE thinks it might be able to talk to a board. There are often one or two misleading ports there, even when nothing is plugged in, that you might see at this point, and can ignore. Note what you can see, and then leave that menu.
Step 4
Now plug in your board using a microUSB cable (which you will have to beg/borrow/steal from someone, or buy for £2 on ebay) and look once more at the
Tools→Port menu of the Arduino IDE. If you see a new port listed there which was not visible in Step 3, then that is your board! Well done! You are in business and you will be able to program it after completing Step 4.5 below. If, however, you cannot see a new port after you plug in your board, it means that either (a) you have a bad cheapo USB cable (one that only has the charging wires and not the data lines -- unlikely but possible so try another) or (b) far more likely you are missing the drivers that Step 1 will provide. Go back, therefore, to Step 1 to install those drivers, reboot and return here and check that the problem is now fixed.
Step 4.5
From within the Tools→Processor menu of the Arduino IDE select "ATmega328P: (Old bootloader)".
Step 5
Select the "blink" example program from the File→Examples→01.Basics menu of the Arduino IDE and then press the upload button (a small right-pointing arrow in a circle, near a tick, in the top left corner of the window holding the blink program) in your Arduino IDE. Your Nano should start blinking. This should compile the code, and then upload it to the micro-controller if the code is error free, where it will then begin to run. The whole process takes about 5 seconds. When the program is running it should blink one of the LEDs on your arduino clone on for one second and off for another, and so on. If that works, you can then try to change the program (e.g. to change the blink delays) and upload again. You are in business. There are lots of other examples programs to try. For those that generate printed output, you will need to have opened the "Serial Monitor" (via Tools→SerialMonitor menu) which you can only do when you have a board plugged in.
Now it is up to you to play, use google, youtube, ask friends, etc. The web has thousands of resources for showing novices how to programme arduino-like devices.
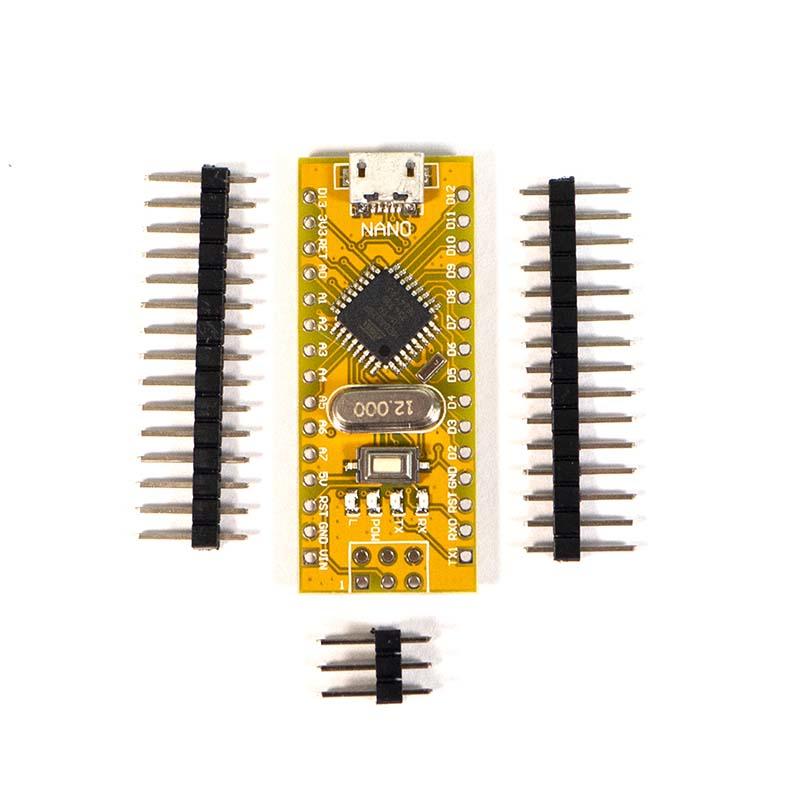
What you have been given:
You have been given a microcontroller which is very similar to (though not entirely identical to) an Arduino nano.
It was purchased here wherein further technical details of this model can be found. In general, however, you will probably be able to find most of the things you need by googling "arduino nano" and assuming that what you see is mostly relevant. The two main differences between what you've been given and the majority of the nanos out there are these:
- Yours has a microUSB connector not a miniUSB connector, since I am guessing that Natscis are more likely to be able to lay their hands on the former than the latter these days.
- To cut costs, yours uses a non-standard USB chip that will probably mean that you
will have to install the driver decribed in Step 1 of the instructions above,
before your computer will recognise that you've plugged your board in.
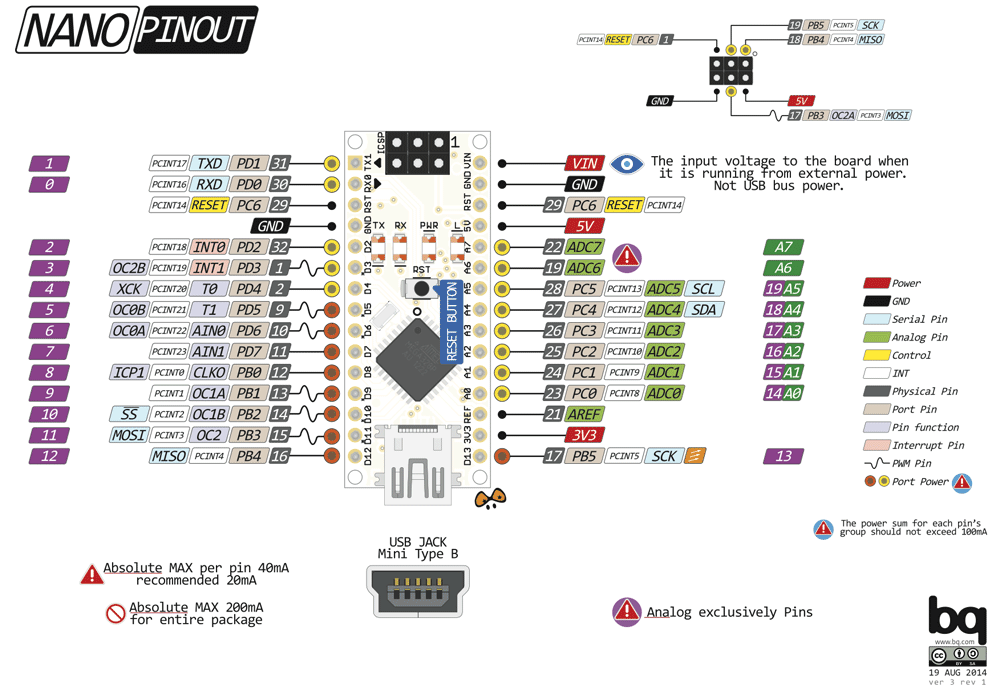
The following diagram may be useful for reference
Why have I been given one?
I want you to be able to give you something tangible that could help you to see that the skills this course provides you with are useful. I want you to see that you don't need to be an expert to buid a stand-alone device that could something useful for you, such as read data from or control a future physics experient, or just making your life easier.
Is it really programmed in C/C++?
No, but the language of the Arduino IDE is pretty similar in many ways. Crudely put, arduinos are programmed in a language that is like C/C++ but with the fancier bits cut out. In theory, with small modifications (helped by google) you could code up most of your weekly programming exercises on one if you set your mind to it. The main differences you might see between the C++ of the lecture course manual and the Arduino IDE are that:
- Your code goes in the loop() method, not in main().
- Though the C++ Standard Template Library can be used with arduino devices (see, e.g. go to Tools→ManageLibraries and search for ArduinoSTL in the filter box of the window that appears) STL-based code may be rather memory hungry on these tiny devices. Therefore, instead of cin and cout arduino-specific printing methods like
Serial.println(x); and
Serial.print(x);
tend to be used. These are simpler than cin and cout (e.gg. they can only print one variable at a time) but they get the job done. As always, google either if you are unsure how to use them.
Gai
PRIZES (2019 only!)
At the end of the course I hope to be able to distribute approximately £100 pounds worth of prizes to the submitters of submissions which most impress me by the end of full term. I will make the decision on what categories of prize will be awarded after I see how you use these micro-controllers, as I don't want to pre-judge or constrain your creativity by putting ideas into you head. However, I would imagine that I might be interested in rewarding qualities similar to these:
- Entries showing complete novices really getting stuck in.
- Entries that show clever physics-related usage.
- Entries that show some clever use of external components (e.g. sensors, LEDs, buzzers).
- Entries that show techincal skill and proficiency (e.g. gettting a tiny device with limited processing power to do something pretty technically amazing, such as finding the first 1000 non-trivial zeros of the Riemann Zeta Function.